Chelsea: The Blue Football Club
This PC Build is kind of long overdue, but I must blog it anyway. Enter, Chelsea, the Blue and White PC. The inspiration of the PC comes from the buyer himself, whom is a huge Chelsea fan.

This build is made for an artist that really loves Chelsea FC. He has been supporting Chelsea since late 2005. Recently at the end of English Premier League or EPL for short, Chelsea got a 2-0 win over Wolves that secured their Champions League spot. Hence, he really wants to dedicate this PC and name the PC after them.
The Photo above shows the parts used for the PC which I will be giving a price breakdown at the end of the blog.
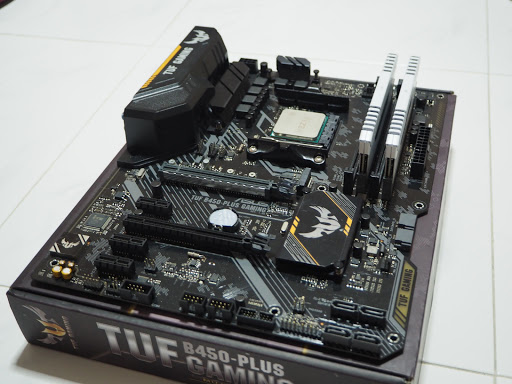
Firstly, we will talk about the motherboard. The motherboard of choice is the Asus TUF B450 Plus Gaming. This motherboard is an ATX Motherboard and it has room for future upgradability if the user wishes to upgrade in the future. The motherboard has a 4+2 Power Phase Design and it has also 4 RAM slots for future upgradability. It also has an M.2 slot for M.2 SSDs, however the SATA 1 slot will be disabled in the process. The board also has connectors for RGB strip header which will be used for the system in the process.
Next, is the processor which is the silver colour chip located in the middle of the motherboard. The processor which I had chosen is the Ryzen 7 2700X. It is an 8 Core 16Threads Processor which will enable the user to multi-task and work efficiently. Part of the reason why I chose this CPU is because the user is an artist and he do a lot of Digital Art works. It also enables him to stream while working on his artwork as it will allow smooth rendering and stable frame rates.
For the RAM, I selected a pair of Corsair Vengeance RGB RAM Clocked at 3000mhz. It’s a 16GB Kit (8GB x2) and the speed of the RAM will enhance the performance of the Ryzen Processor and it will help the user to get higher frames when gaming.
For the CPU Cooler I decided to go with the AMD Stock Prism Cooler as it has 4 heat-pipes. It is also easy to install and it cools the processor easily. It also comes free with the processor too, so there is no money spent on the cooler.
The case used for this project is no other then the Tecware Forge ATX version. It comes with 2 200mm case fans at the front and 120mm case fan at the back.
Both are Tecware Orbis fans that are ARGB and they can be sync with the controller by the user. The front, top and bottom have mesh to prevent dust from going in easily and it enables for easy cleaning by the user.
After putting the motherboard into the case, this is what it looks like.
After wiring all the wires and attaching them to the motherboard, this is what it looks like
The Graphics card/Video card I have chosen is shown below.
It’s the Power-Colour RX570 8GB which I had bought in the Previous Loot Blog. It is a budget to Mid-range card that is readily available in the market. It can play most AAA games on medium settings and it has good heat dissipation too.
After putting everything together, this is what it looks like. The interior looks spacious and it allows for good cable management. I did not show the process, but the system comes with a 256GB SATA SSD and a 1TB Hard drive to store games.
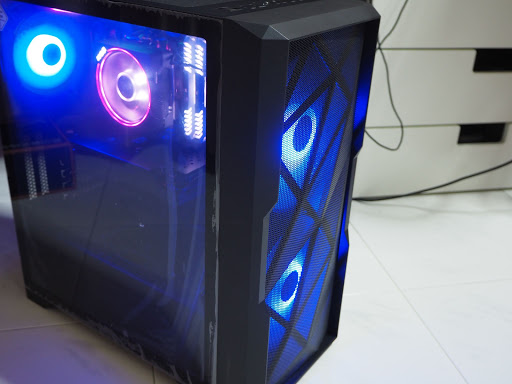
After switching the system on, I was greeted with a flash of blue and pinkish lights, however, I quickly set it to white in the interior as it should be needed for the Chelsea theme.
This is how the system looks like after setting the lights. It really looks like Chelsea’s home kit which is Blue at the top and White at the bottom. It’s amazing to see how it appeared and I am excited to when the owner will receive it the following day.
This is what the system looks like before its being delivered.
I am grateful for everyone who came here to read the blog and I really wish everyone would take care as the pandemic is still going on. Do wear your masks out as it will prevent the disease from spreading and it will control the situation around the world. Do take care and stay safe.
All Credits to Jarrod (Jarmix) for allowing me to take photos while building Chelsea.
Do visit him on his twitch channel: https://www.twitch.tv/jarmix
Or His Instagram ‘Art’: https://www.instagram.com/_jarmix_/
Instagram ‘Comic’: https://www.instagram.com/jarmix_comics/?hl=en
PC Parts List (All Prices are in SGD/CAD/AUD):
CPU- Ryzen 7 2700X (8Core/16Threads) (220) (Used)
Motherboard- Asus TUF B450-Plus Gaming (115) (Used)
RAM- Corsair Vengeance RGB White (8GB x2) 3000mhz (120) (Used)
GPU- PowerColor Red Dragon RX570 8GB (130) (Used)
PSU- FSP Hyper K 500W Non-Modular (65) (New)
SSD- Lexar NS100 256GB SATA SSD (62) (New)
HDD- Toshiba 1TB 7200rpm P300 (57) (New)
Case- Tecware Forge ATX (99) (New)
Case Fan – ID Cooling ZF-12025 RGB Trio Type 3 (New)
Total Cost - 933


No comments:
Post a Comment